Germinating pepper seeds is the critical first step in growing healthy pepper plants. Proper germination ensures strong, uniform seedlings. Pepper seeds require warmth, moisture, and light to sprout successfully. Starting seeds indoors gives gardeners control over conditions. Healthy germination reduces seed wastage and prevents early losses. Seedlings grown from high-quality seeds are more vigorous. Understanding germination improves overall crop productivity. With attention to detail, anyone can grow robust peppers at home.
Benefits of Germinating Seeds Indoors
Indoor germination protects seeds from temperature fluctuations and pests. It allows an early start, extending the growing season. Seed trays or small pots provide consistent warmth and moisture. Indoor germination promotes uniform growth and faster sprouting. Gardeners can monitor seedlings closely. It reduces transplant shock when seedlings are moved outdoors. Early germination ensures timely flowering and fruiting. Indoor sowing improves overall yield quality.
Selecting the Right Pepper Seeds
Choose high-quality, fresh seeds for the best germination rates. Hybrid varieties often sprout faster and produce uniform plants. Heirloom seeds provide unique flavors and colors but may germinate slower. Select seeds suited to your local climate. Check packaging for germination percentage. Avoid old or poorly stored seeds. Selecting the right seeds increases success rates. Proper seed selection saves time and resources.
Timing for Sowing Pepper Seeds
Pepper seeds should be sown 8–10 weeks before the last frost. In warmer climates, early spring is ideal. Avoid sowing too early, which can produce weak, leggy seedlings. Correct timing ensures healthy transplanting. Indoor sowing allows gardeners to control temperature and light. Planning the sowing schedule guarantees an early harvest. Timing affects flowering and fruiting speed. Proper timing maximizes plant productivity.
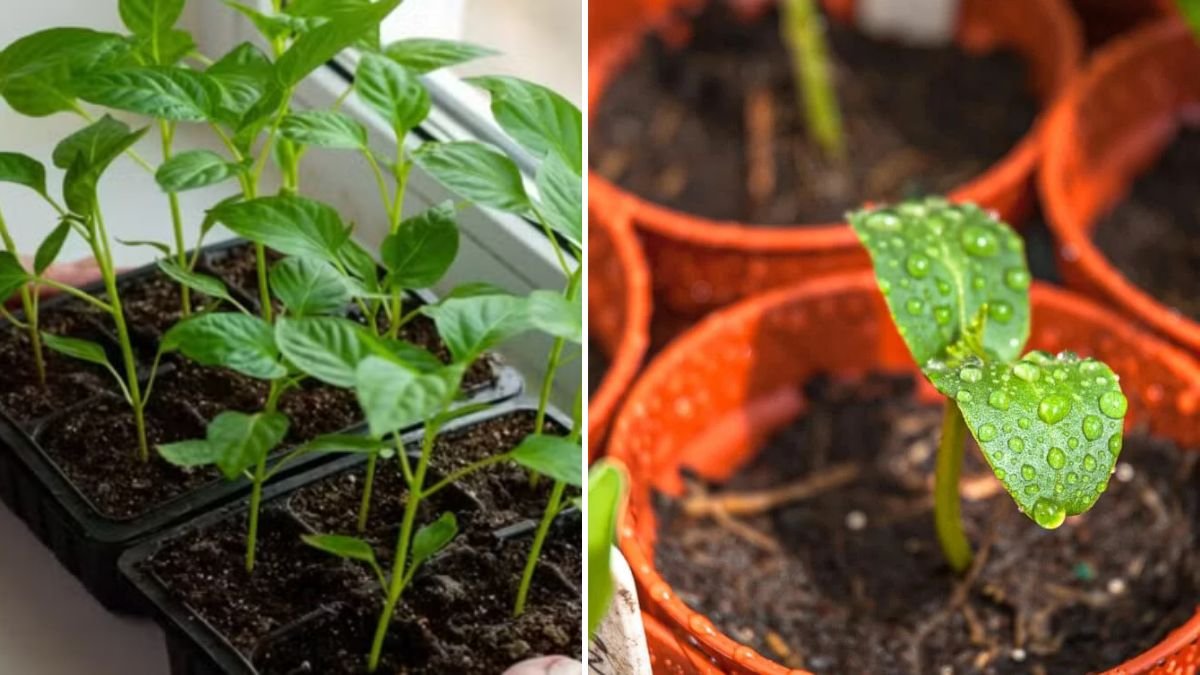
Containers for Germination
Use shallow seed trays, small pots, or seedling flats with drainage holes. Clean containers prevent fungal infections. Lightweight containers allow easy relocation. Label each container with the pepper variety. Sterilize trays to reduce damping-off disease. Adequate drainage prevents waterlogging and root rot. Containers provide uniform conditions for faster germination. Using proper trays ensures strong seedlings.
Seed-Starting Medium
Use a light, well-draining medium for germination. Mix compost, coco peat, and sand to ensure moisture retention without suffocation. Avoid heavy garden soil. Sterilized medium prevents disease. Loose texture allows roots to penetrate easily. Rich, organic soil encourages healthy seedling development. Proper soil increases germination success. A high-quality medium accelerates sprouting.
Sowing Pepper Seeds
Plant seeds about 0.5–1 cm deep in the medium. Cover lightly with soil or vermiculite. Avoid overcrowding to prevent competition. Water gently after sowing to settle soil. Label each tray for identification. Correct depth ensures quick germination. Proper sowing prevents uneven sprouting. Following this method establishes strong seedlings.
Watering Techniques
Consistent moisture is crucial for germination. Avoid overwatering, which can cause rot or fungal infection. Use a spray bottle to gently moisten the soil. Keep the medium damp but not soggy. Mulching with fine vermiculite retains moisture. Morning watering is ideal for drainage. Proper hydration supports root development. Correct watering improves germination success rates.
Temperature Requirements
Pepper seeds germinate best between 24–30°C. Warm soil accelerates sprouting. Cold temperatures delay or prevent germination. Use heat mats in cooler regions for uniform warmth. Avoid sudden temperature changes. Stable warmth ensures consistent germination. Proper temperature reduces seedling stress. Maintaining warmth indoors ensures faster results.
Light Requirements
Once seedlings sprout, they require 12–14 hours of bright light daily. Natural sunlight near windows works, but grow lights are ideal indoors. Insufficient light causes leggy, weak seedlings. Rotate trays to promote even growth. Adequate light strengthens stems and promotes healthy leaves. Proper light exposure encourages faster development. Healthy seedlings are more resilient to transplant shock.
Monitoring Seedling Growth
Inspect seedlings daily for signs of stress or disease. Yellow leaves may indicate overwatering or nutrient deficiency. Leggy seedlings show insufficient light. Monitor moisture levels carefully. Healthy seedlings have vibrant green leaves and firm stems. Early intervention prevents long-term problems. Regular monitoring ensures strong seedlings. Observing growth patterns allows timely adjustments.
Thinning Seedlings

Thin crowded seedlings to prevent competition for nutrients. Keep the strongest plants and transplant extras into separate pots if needed. Proper spacing ensures healthy root development. Thinning improves airflow, reducing disease risk. Healthy spacing promotes balanced growth. Early thinning strengthens plants. Correct thinning ensures maximum survival. Thinning enhances overall seedling quality.
Fertilizing Young Seedlings
Start light fertilization once true leaves appear. Use diluted organic fertilizer to avoid burning roots. Feed every 1–2 weeks. Phosphorus and potassium encourage root and flower development. Nitrogen supports healthy foliage without delaying fruiting. Proper nutrition strengthens seedlings. Balanced feeding ensures strong transplants. Healthy leaves contribute to better productivity.
Hardening Off Seedlings
Acclimate seedlings to outdoor conditions gradually. Start with 1–2 hours of sunlight daily, increasing duration over 7–10 days. Protect from wind, rain, and extreme temperatures. Hardening off prevents transplant shock. Proper acclimation ensures seedlings adapt quickly. Gradual adjustment encourages early flowering. Hardened seedlings establish faster outdoors. This step is critical for success.
Transplanting Seedlings
Transplant when seedlings have 4–6 true leaves. Prepare soil enriched with compost. Plant at the same depth as in containers. Water thoroughly after transplanting. Mulch around the base to retain moisture. Handle seedlings gently to avoid root damage. Proper transplanting accelerates establishment. Healthy transplants grow faster and produce more fruit.
Pest and Disease Management
Protect seedlings from aphids, cutworms, and fungal infections. Inspect regularly and use organic sprays if necessary. Maintain spacing and airflow. Healthy seedlings resist pests better. Avoid overwatering to prevent disease. Early detection reduces crop loss. Monitoring ensures robust plants. Preventive care accelerates fruit production.
Pepper Seed Germination Table
| Factor | Ideal Condition | Benefit |
|---|---|---|
| Soil | Light, well-drained | Quick root development |
| Temperature | 24–30°C | Uniform germination |
| Water | Moist but not soggy | Prevents rot |
| Light | 12–14 hours daily | Strong seedlings |
Common Mistakes to Avoid
Overwatering causes root rot. Poor lighting leads to leggy seedlings. Planting too deep delays germination. Crowded trays reduce airflow. Using old seeds lowers success. Ignoring hardening off leads to transplant shock. Skipping monitoring causes unnoticed stress. Avoiding mistakes ensures healthy seedlings and faster fruiting.
Conclusion
Germinating pepper seeds properly lays the foundation for a productive pepper garden. Attention to soil, light, water, and temperature ensures strong seedlings. Thinning, fertilizing, and hardening off prevent common issues. Healthy seedlings adapt quickly to outdoor conditions. Following these steps accelerates flowering and fruiting. Properly grown seedlings produce larger, flavorful peppers. Home gardeners benefit from higher yield and faster harvest. Successful germination guarantees robust, productive plants.